

A dated kitchen can feel like a maze, but you can turn it into a clear, efficient workspace with a few strategic changes. Start by evaluating how you move between the sink, hob, fridge, and dining area, then improve the layout before choosing finishes. Better storage, layered lighting, generous worktops, updated cabinets, and reliable appliances can transform daily routines without erasing character. The right priorities will depend on your space, budget, and how you use it.
Key Takeaways
- Reconfigure the layout around efficient cooking, cleaning, and serving routes, positioning the sink, hob, and refrigerator within an effective work triangle.
- Replace cramped peninsulas with streamlined islands or compact worktop extensions, maintaining comfortable circulation and clearances.
- Maximise storage with ceiling-height cabinets, deep drawers, pull-out larders, corner solutions, and organised internal fittings.
- Improve functionality using layered lighting, under-cabinet LEDs, durable worktops, accessible sockets, and upgraded integrated appliances.
- Refresh dated cabinetry with warm, durable paint, modern hardware, repaired fittings, and preserved vintage details that complement the updated design.
Modernise Your Old Kitchen Layout
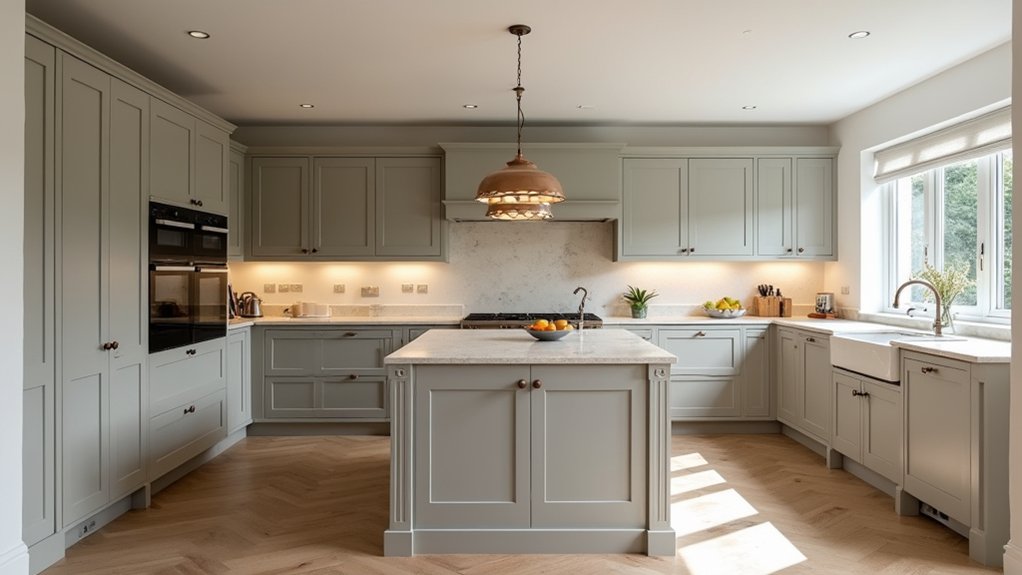
Modernising an old kitchen layout starts with evaluating how you use the space each day. Map your cooking, cleaning, and serving routes, then reposition key zones so movement feels natural. Replace a cramped peninsula with a streamlined island only if it improves circulation, maintaining clear walkways around doors and appliances.
Align the sink, hob, and refrigerator into an efficient work triangle, while updating awkward corners with purposeful, accessible design. Choose contemporary cabinetry profiles, integrated appliances, and durable surfaces to create a clean foundation.
You don’t need to erase character: preserve Vintage charm through a restored timber detail, period-inspired hardware, or a classic ceramic sink. Add Rustic accents sparingly, such as reclaimed wood shelving or textured lighting, so warmth complements the modern layout without making the kitchen feel dated or visually crowded.
Maximise Storage Without Expanding
Once the layout flows well, make every cabinet and wall work harder so you gain storage without enlarging the room. Extend wall units to the ceiling, reserving upper shelves for seasonal cookware and less-used appliances.
Fit deep drawers below the worktop for pans, dishes, and food containers; they provide clearer access than low cupboards. Add pull-out larders, corner carousels, and narrow vertical cabinets to reclaim awkward gaps.
Use drawer dividers, peg systems, and tiered risers to keep essentials visible and orderly. Mount rails inside cabinet doors for spices, lids, or cleaning tools, while a recessed shelf can hold frequently used items.
Prioritise smart storage with ergonomic design: place everyday equipment between waist and shoulder height, and group supplies according to how you prepare meals.
Choose consistent fronts and internal fittings for a refined, spacious appearance.
Add Better Lighting and Worktop Space
Good lighting and sufficient worktop space can transform how efficiently and comfortably a dated kitchen functions. Start with layered illumination: use ambient lighting for overall brightness, then add under-cabinet LEDs to eliminate shadows across preparation areas. Consider adjustable pendant lights above an island or dining zone, ensuring their scale suits the room and their positioning doesn’t obstruct sightlines.
For countertop expansion, look for overlooked opportunities rather than forcing a complete redesign. Extend a short run, add a compact peninsula, or install a fold-down surface where circulation allows. Keep preparation space beside the hob and sink, and choose durable, easy-clean materials that complement your existing layout.
Maintain clearances around doors and walkways, and plan sockets before installation. A lighting and worktop plan should improve flow, safety, and visual balance without overcrowding your kitchen. Aim for generous, uninterrupted preparation zones.
Refresh Cabinets and Appliances
Refresh tired cabinetry and appliances before committing to a full replacement, as targeted updates can give the kitchen a cleaner look and improve everyday performance. Start with cabinet repainting: choose a durable satin or eggshell finish in a light, warm tone to make the layout feel more spacious.
Replace dated handles with streamlined hardware, ensuring the new centres match existing holes or using a template for accurate drilling. Repair sticking doors, worn hinges, and damaged drawer runners while you’re working.
Then assess appliance upgrading opportunities. A quiet dishwasher, induction hob, or integrated fridge can sharpen the kitchen’s appearance while adding useful efficiency. Keep finishes consistent, such as pairing stainless steel with brushed nickel, and check each appliance’s dimensions, ventilation, and connections before ordering.
These focused changes modernise the room without disrupting its essential layout.
Control Your Kitchen Renovation Budget
Set a clear renovation budget before choosing finishes, appliances, or structural changes, and divide it into fixed costs, design upgrades, and a contingency of around 10–15% for unexpected repairs. Strong budget planning keeps your layout decisions realistic and prevents attractive details from undermining essential work.
Price cabinetry, worktops, flooring, lighting, plumbing, labour, and waste removal before signing contracts. Request itemised quotes, confirm lead times, and ask how suppliers handle variations.
Prioritise changes that improve workflow, storage, and durability, then simplify decorative elements if costs rise. Compare appliance specifications rather than choosing by brand alone, and retain sound units where practical.
Useful cost saving tips include invigorating cabinet doors, standardising dimensions, and selecting readily available materials. Track every payment in a spreadsheet, review the total weekly, and approve changes in writing.
Frequently Asked Questions
Can I Modernise My Kitchen Layout Without Removing Existing Walls?
Yes, you can modernise your kitchen layout without removing walls. Reposition appliances, improve storage, add open shelving, install under cabinet lighting, and refresh worktops, hardware, flooring, and finishes for a streamlined, functional transformation.
How Long Does a Typical Dated Kitchen Renovation Take?
You’ll typically need four to eight weeks, depending on your kitchen’s size, structural changes, and material availability. Plan Kitchen lighting, Appliance upgrades, cabinetry, installation, inspections, and possible delays carefully to keep your renovation moving smoothly.
Do I Need Planning Permission for My Kitchen Renovation?
You usually don’t need planning permission for an internal kitchen renovation, but structural changes, extensions, or listed properties may trigger permit requirements. Check local building regulations and consult your council before starting work.
What Flooring Options Work Best in a Modernised Kitchen?
You’ll find porcelain tiles, engineered wood, and luxury vinyl work best: each handles traffic and spills while offering stylish finishes. Choose luxury finishes or eco friendly materials, but verify durability, maintenance, and underfloor-heating compatibility before installation for lasting performance.
Should I Hire a Kitchen Designer or Manage the Renovation Myself?
Hire a kitchen designer if you’re changing layouts, plumbing, or electrics; their expertise can prevent costly mistakes. Manage simpler updates yourself, but prioritise budget planning and material selection, then coordinate trades carefully throughout the renovation.
About the Author


