Does improving your driveway really require a complete replacement? In most cases, you can extend its life and improve its appearance through regular inspections, timely repairs, effective sealing, and better drainage. You’ll also protect the surface by controlling weeds, preventing stains, maintaining clean edges, and following seasonal maintenance routines. The right materials and professional techniques matter, but one overlooked problem can undermine every improvement—starting with the base and drainage.
Key Takeaways
- Inspect regularly for cracks, potholes, pooling water, crumbling edges, stains, and vegetation before minor damage becomes expensive.
- Improve drainage with proper grading, clean gutters, downspouts, swales, or channel drains to prevent erosion and foundation damage.
- Repair cracks and potholes promptly using appropriate fillers and patching materials, ensuring surfaces are clean, dry, and compacted.
- Apply a compatible, high-quality sealer in thin, even coats during suitable weather, following coverage and curing instructions.
- Protect and enhance the driveway with durable edging, regular cleaning, controlled vegetation, suitable winter tools, and attractive pathway lighting.
Inspect Your Driveway for Damage
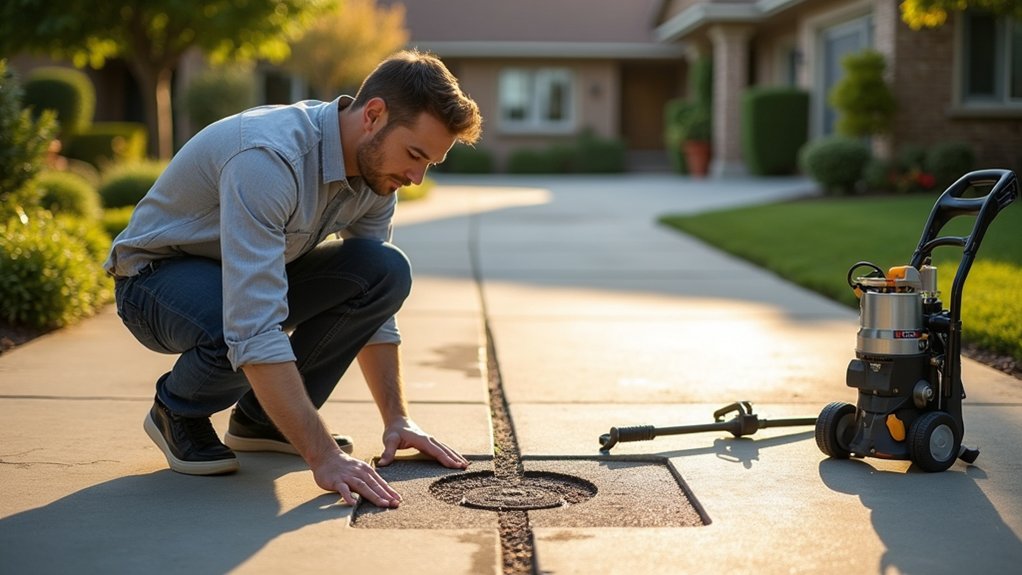
Before improving your driveway, inspect it for cracks, potholes, crumbling edges, and areas where the surface is sinking or heaving. Note each defect’s size, location, and severity, then photograph the surface for comparison after repairs. Check joints, corners, and areas around utility covers, where deterioration often begins.
Lightly probe questionable spots with a screwdriver; soft or hollow sections may require professional evaluation. Watch for loose aggregate, fading, stains, and tire marks that affect both safety and appearance.
Your inspection should also consider Driveway aesthetics, including uneven shifts, visible patches, and worn borders. Review landscaping integration as well: overgrown plants, encroaching roots, or soil against the pavement can conceal damage. Mark problem areas with chalk, and prioritize hazards before planning cosmetic improvements or resurfacing.
Avoid disturbing unstable sections until you’ve identified their causes.
Fix Drainage and Stabilize the Base
Address drainage problems before repairing the driveway surface, since standing water and saturated soil can quickly undermine new work. Inspect slopes, edges, gutters, and downspouts to identify where water collects or crosses the pavement. Choose appropriate drainage solutions, such as swales, channel drains, catch basins, or extensions that direct runoff safely away. Clear blocked outlets and correct low areas so water can move without eroding surrounding soil.
Next, evaluate the driveway’s foundation. Remove soft, organic, or contaminated material, then replace it with properly graded crushed stone. Spread the aggregate in layers and compact each layer thoroughly to create reliable base stabilization.
Check the finished grade before placing any surface material, ensuring it sheds water consistently. If soil remains unstable, consult a qualified contractor about geotextiles or deeper excavation.
Regularly maintain drains and inspect the base after severe weather.
Repair Cracks and Potholes Early
Inspect your driveway regularly so you can identify cracks and potholes before they worsen.
Fill cracks promptly to keep water from reaching the base and causing further damage.
Repair potholes early, or they’ll expand under traffic and weather exposure.
Identify Damage Early
Small cracks and potholes can quickly let in water, expand during freeze-thaw cycles, and weaken the driveway’s base. Inspect your surface regularly, especially after winter, heavy rain, and extreme temperature changes. Walk the entire driveway and look for hairline fractures, widening joints, crumbling edges, loose aggregate, depressions, and standing water.
Pay attention to areas near downspouts, gates, and tree roots, where drainage or pressure can accelerate deterioration. Mark questionable spots and photograph them so you can compare their size over time. Early identification supports timely repairs before minor defects compromise the foundation or become expensive structural problems.
It also protects driveway aesthetics and reinforces homeowner education by helping you recognize warning signs. If damage spreads, sinks, or affects vehicle traction, schedule a professional assessment promptly. Regular monitoring keeps maintenance predictable and helps preserve long-term durability.
Fill Cracks Promptly
Once you’ve identified cracks or potholes, repair them promptly to prevent water from reaching the driveway’s base. Clean each damaged area thoroughly, removing dirt, vegetation, loose asphalt, and standing moisture.
For narrow cracks, use a compatible elastomeric filler that can accommodate normal pavement movement. Wider cracks may require backer material before you apply the sealant. During crack filling, follow the product’s temperature and curing requirements for a durable bond.
Patch potholes with a quality repair mix, compacting each layer firmly and finishing it slightly above the surrounding surface to allow settling.
Schedule sealant application only after repairs have cured and the pavement is clean and dry. If damage is extensive or the base feels unstable, contact a paving professional for an accurate assessment and appropriate repair method before applying materials.
Prevent Pothole Expansion
Prompt repairs keep minor driveway damage from becoming a larger, costlier problem. When you spot a pothole, remove loose debris and moisture before applying a suitable patching compound. Follow the product’s preparation and curing instructions, then compact the material firmly so traffic won’t reopen the hole.
For deeper damage, you’ll need a layered repair rather than a surface fill; otherwise, water can collect beneath the patch and enlarge the pothole.
Schedule pothole repair during dry weather, and inspect nearby cracks for connected damage. Sealing those cracks limits water infiltration and helps stabilize the surrounding pavement.
If your driveway shows repeated failures, consider professional Driveway reinforcement, such as improving the base or adding a durable overlay.
Regular inspections, prompt repairs, and effective drainage will protect your investment and preserve a smoother, safer surface.
Choose the Right Driveway Sealer
Choosing the right driveway sealer starts with matching the product to your driveway’s surface and condition. Review the label to confirm compatibility with asphalt, concrete, or previously sealed areas.
Sealant types include penetrating formulas, which protect without creating a heavy film, and film-forming products, which add a visible barrier and can refresh faded color.
Consider your climate, traffic level, moisture exposure, and desired finish before buying.
Water-based sealers typically produce fewer odors and simplify cleanup, while solvent-based options may offer stronger resistance and richer appearance.
Read the manufacturer’s coverage, drying, and recoat requirements carefully.
Plan your application techniques around weather conditions, and choose tools that suit the product.
Don’t select solely by price; a compatible, quality sealer can reduce maintenance and extend your driveway’s service life.
Seal Concrete and Asphalt Properly
Choose a sealer formulated specifically for your concrete or asphalt driveway.
Clean and dry the surface thoroughly, then apply even, protective coats according to the manufacturer’s instructions.
You’ll improve resistance to moisture, stains, cracking, and fading while maintaining a cleaner appearance.
Choose the Right Sealer
A quality sealer protects your driveway from water, oil, UV rays, and seasonal wear, but the right product depends on the surface. For concrete, choose a breathable acrylic or penetrating silane-siloxane sealer that limits moisture intrusion without trapping vapor.
If you have asphalt, select an asphalt emulsion or coal-tar-free acrylic formulated for flexible pavement; avoid products intended for concrete. Compare sealer types by durability, finish, drying requirements, and environmental impact.
Read the label to confirm compatibility with your driveway’s age, condition, and previous coating. Your climate matters, too: penetrating formulas suit freeze-thaw regions, while UV-resistant options help in sunny areas.
Review recommended application techniques, equipment, and temperature limits before buying. If cracks, stains, or oil contamination remain, address those repairs first so the sealer bonds properly.
Apply Even, Protective Coats
Once the surface is clean, dry, and properly repaired, apply the sealer in thin, even coats to prevent puddles, streaks, and uneven curing. Surface preparation matters because dust, moisture, or loose material can weaken adhesion and shorten the coating’s life.
Use a quality squeegee, roller, or sprayer suited to your driveway material, and work in manageable sections. Maintain steady pressure and overlap each pass slightly to achieve consistent coverage without leaving ridges.
Pay close attention to coating consistency; stir the product regularly, but don’t introduce air bubbles through excessive mixing. Follow the manufacturer’s coverage rate and drying times, since applying too much sealer can trap moisture or create a soft finish.
Keep vehicles, pets, and foot traffic off the driveway until the coating has fully cured.
Prevent Stains, Weeds, and Surface Damage
Protect your driveway by cleaning oil, leaves, and other spills promptly before they penetrate the surface and leave permanent stains. For effective stain prevention, use an absorbent material on fresh oil, then scrub with a suitable cleaner and rinse thoroughly. Don’t use harsh chemicals that can weaken the pavement or damage its protective coating.
Maintain weed control by removing growth from cracks before roots expand and widen them. Apply an appropriate crack filler to keep water and seeds out, and inspect repairs regularly.
Sweep away grit, deicing salts, and debris that can abrade the surface. During winter, choose calcium magnesium acetate or sand instead of excessive rock salt.
Avoid dragging heavy equipment, parking vehicles with fluid leaks, and using sharp tools that can gouge or chip your driveway.
Improve Edges, Lighting, and Curb Appeal
Well-defined driveway edges prevent crumbling and keep gravel, soil, and lawn growth from spreading onto the pavement. Install durable concrete, brick, stone, or metal borders to contain the surface and create a clean boundary to your yard. Choose decorative edging that complements your home while resisting moisture, vehicle impact, and shifting soil.
Keep borders level and firmly anchored so they don’t become tripping hazards or interfere with snow removal. Add low-voltage or solar lighting along the edges to improve nighttime visibility and highlight the driveway’s shape. Position fixtures outside the vehicle path, and aim them downward to reduce glare.
Complete these landscaping enhancements with neatly trimmed planting beds, balanced mulch, and a clear approach. A coordinated design boosts curb appeal while protecting the driveway’s edges from routine traffic and erosion.
Follow a Seasonal Driveway Maintenance Plan
A seasonal maintenance plan helps you catch small problems before weather and traffic turn them into costly repairs. In spring, inspect for cracks, potholes, pooling water, and shifting edges. Clean drainage channels, remove debris, and schedule repairs before damage spreads.
During summer, seal suitable asphalt surfaces, control weeds, and keep heavy vehicles off weakened areas. Include seasonal pruning to prevent branches from scratching vehicles, blocking sunlight, or dropping roots near the driveway.
In fall, clear leaves regularly because trapped moisture encourages stains, moss, and surface deterioration. Before freezing weather, confirm that drainage works and mark driveway edges.
Practice careful winter snow removal: use a plastic shovel or properly adjusted plow, avoid metal blades, and don’t pile snow against the pavement. After each season, document changes and address problems promptly.
Frequently Asked Questions
How Much Does Professional Driveway Resurfacing Typically Cost?
Professional driveway resurfacing typically costs $3–$10 per square foot, or $1,500–$5,000 for a standard driveway. Your final price depends on materials, repairs, size, and location. Compare quotes for Cost comparison; follow Budget tips.
Should I Replace or Repair an Aging Driveway?
You’ll know instantly: repair minor cracks with crack filling and driveway sealing, but replace the surface when widespread cracking, potholes, drainage problems, or unstable foundations make repairs a temporary bandage at best.
How Long Does a Properly Maintained Driveway Usually Last?
You can expect a properly maintained asphalt driveway to last 15–30 years, while concrete typically lasts 25–40 years. Regular Driveway maintenance and durability enhancement, including sealing, cleaning, and prompt repairs, help you maximize its lifespan.
Can I Install a Driveway Over Existing Concrete or Asphalt?
You can install over existing concrete or asphalt if it’s stable, clean, and properly graded; think of it as building on solid ground. Repair cracks, prioritize sealing cracks, and use professional asphalt paving to prevent premature failure.
Which Driveway Material Best Suits My Home’s Architectural Style?
You’ll match your home best with a driveway reflecting its architecture: choose brick or pavers for traditional designs, concrete for modern homes, and gravel for rustic properties. Prioritize Architectural harmony and Material compatibility with existing features.
About the Author