

Repainting your kitchen cabinets can give the room a clean, modern appearance without a full renovation. Start by choosing a durable cabinet paint in a neutral shade, then remove the hardware, clean away grease, repair damage, and sand every surface. A quality primer and thin, even coats will help prevent peeling and brush marks. Once the finish cures, reinstall the hardware and inspect the details—but the right preparation determines whether the result looks professional.
Key Takeaways
- Choose durable cabinet paint in a satin or semi-gloss finish that complements your countertops, backsplash, flooring, and lighting.
- Remove and label doors, drawers, hinges, and hardware to simplify reassembly and achieve a cleaner, more professional result.
- Thoroughly degrease, repair, sand, and prime every cabinet surface to ensure smooth, long-lasting paint adhesion.
- Apply several thin, even coats using angled brushes for edges and foam rollers for broad panels, allowing proper drying between coats.
- Reinstall hardware after the paint fully cures, then inspect under bright light and correct drips, brush marks, or uneven gaps.
Choose Paint for Your Kitchen Cabinets
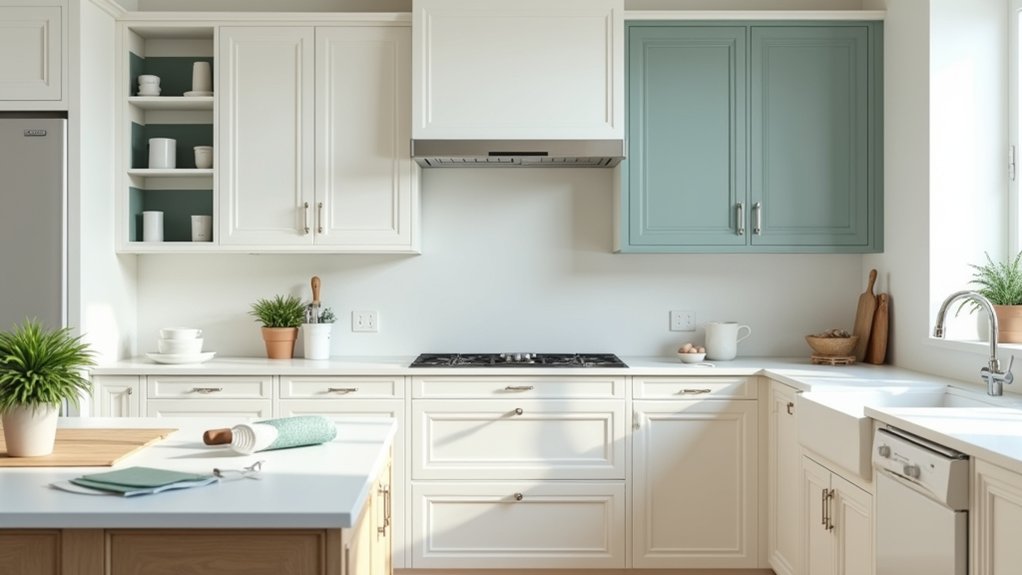
Choose a durable, cabinet-specific paint that can withstand frequent handling, moisture, grease, and regular cleaning. Look for formulations labeled for wood or laminate cabinets, depending on your surfaces, and confirm the paint offers strong adhesion and hardness after curing.
Water-based acrylic-alkyd paint provides low odor, easy cleanup, and a smooth, resilient finish. Oil-based paint remains durable but takes longer to dry and may yellow over time.
Compare Color palettes with your countertops, backsplash, flooring, and lighting before choosing a shade. Consider how each color will look across all cabinet doors and frames, not just on a sample card.
Evaluate finish options carefully: satin offers subtle sheen and easy cleaning, while semi-gloss reflects more light and highlights surface imperfections. Avoid flat finishes, which absorb grime and clean poorly.
Gather Your Cabinet Painting Supplies
Gather essential tools such as screwdrivers, sandpaper, brushes, rollers, and drop cloths before you begin.
Choose a quality primer and cabinet-specific paint for a durable, smooth finish.
Don’t forget protective gear and supplies, including gloves, safety glasses, a mask, and painter’s tape.
Essential Painting Tools
Before you begin, gather the essential tools and supplies for a smooth, durable cabinet-painting project. Choose a screwdriver or drill to remove doors, hinges, and hardware, then label each piece for easy reassembly.
Keep a drop cloth, painter’s tape, and plastic sheeting nearby to protect floors, counters, and appliances.
Use a degreasing cleaner, microfiber cloths, and a bucket for surface preparation.
For application, select high-quality angled brushes for corners and detailed brush techniques, plus a small foam roller for broad, smooth areas.
A sanding block or fine-grit sandpaper will help you create an even surface, while a vacuum and tack cloth remove dust.
Add gloves, safety glasses, and a respirator for protection.
Finally, prepare a paint tray, stir sticks, and a drying rack to support an even paint finish.
Quality Primer and Paint
Quality primer and paint form the foundation of a durable, professional cabinet finish. Choose products formulated specifically for wood, laminate, or previously painted surfaces, depending on your cabinet material.
Compare primer types carefully: bonding primer improves adhesion on slick surfaces, while stain-blocking primer helps conceal grease marks, water stains, and wood tannins.
Select a cabinet or trim enamel that dries hard and resists chipping, rather than ordinary wall paint.
Consider your desired paint finish; satin offers a subtle sheen and hides minor flaws, while semi-gloss provides greater washability and reflects more light.
Check the label for recoat times, coverage, and compatibility with your primer.
Buy enough product to complete every door, drawer, frame, and exposed side, ideally from the same batch for consistent color throughout your kitchen renovation project.
Protective Gear and Supplies
Once you’ve chosen your primer and paint, assemble the protective gear and supplies that will keep the work area clean and make painting safer. Wear safety glasses to shield your eyes from splashes, a dust mask or respirator when sanding, and chemical-resistant gloves for handling cleaners, stripper, or primer.
Choose protective equipment suited to each product’s label and work in a well-ventilated space. Cover countertops, floors, appliances, and nearby walls with plastic sheeting or durable drop cloths; secure edges with painter’s tape. Keep paper towels, clean rags, and a container for used materials close by.
Use a sturdy step stool instead of a chair, and keep a first-aid kit accessible. These safety precautions reduce mess, prevent injuries, and help you maintain a controlled, efficient painting setup throughout the project.
Remove Doors, Drawers, and Hardware
Before removing anything, label each door, drawer, and hinge location so you’ll reinstall every piece correctly.
Place screws, handles, and other hardware in labeled bags or containers. Keep the hardware together in a secure location while you prepare the cabinet surfaces.
Label Each Piece
Label each cabinet door, drawer, and hardware set as you remove it so every piece returns to its original position. Use painter’s tape and a pencil to mark doors and drawers with matching cabinet numbers. Place the label inside the hinge area or on the back surface, where sanding and painting won’t obscure it.
For hardware, assign a number to each door or drawer and mark the corresponding pieces without altering their placement. Photograph each cabinet section before removal, especially where doors overlap or use different hinge positions.
Keep your numbering system consistent from left to right, then top to bottom. Don’t rely on memory, even if the layout seems simple. Accurate labels help you reinstall everything correctly and preserve your planned color palette and paint finish.
Store Hardware Safely
With every door and drawer labeled, remove the hardware and store each set with its matching piece. Place screws, hinges, pulls, and knobs in separate resealable bags, then write the cabinet location on each label. If several pieces look identical, keep their original screws together because small differences can affect hardware installation.
Tape each bag securely to its corresponding door or drawer, or organize all bags in a divided container. Don’t leave hardware loose on the work surface, where it can roll away, collect paint, or become mixed with another set.
Before cleaning, photograph unusual hinge positions and note any spacers or washers. Keep the container in a dry, protected area throughout the project. These steps help you store hardware safely and make reassembly faster, cleaner, and more accurate.
Clean and Degrease Every Surface
Start by removing cabinet hardware and wiping away loose dust. Then scrub every cabinet surface with a degreasing cleaner to remove cooking oil, grease, and residue.
Use a nonabrasive sponge or microfiber cloth, working from the top down and paying special attention to handles, edges, corners, and areas above the range. Follow the cleaner’s label directions, allowing it to sit briefly if needed, but don’t let the solution dry on the finish.
Rinse with a clean, damp cloth to remove cleaner residue, then wipe the cabinets dry with lint-free towels. For effective surface preparation, repeat these cleaning techniques wherever water beads or grime remains.
Keep your workspace ventilated, and change dirty rinse water often. Let every surface dry completely before continuing with the repainting process.
Repair and Sand Doors, Drawers, and Boxes
Once the cabinets are clean and fully dry, inspect each door, drawer, and cabinet box for dents, cracks, loose joints, peeling finish, or water damage. Tighten loose screws, reglue separated joints, and fill dents or small cracks with quality wood filler.
Replace badly swollen particleboard or severely damaged parts rather than painting over them. Remove door hinges and drawer slides, labeling each piece and storing hardware in separate bags. Check that doors sit flat and drawers move smoothly before sanding.
Use medium-grit sandpaper to dull the existing finish, then switch to fine-grit paper for a smoother surface. Sand edges lightly to avoid rounding them, and feather peeling areas until they feel level.
Vacuum dust from every surface, then wipe with a clean, lint-free cloth. Don’t skip corners, profiles, or box interiors.
Prime Cabinets for Better Paint Adhesion
After sanding and removing all dust, apply a high-adhesion primer to every cabinet surface, including doors, drawer fronts, edges, and exposed box areas.
Before opening the can, complete primer preparation by stirring thoroughly and checking the product label for compatibility with your cabinet material and chosen topcoat.
Use a clean brush or roller suited to the primer, and work in a well-ventilated area.
Cover hinges, hardware holes, and surrounding surfaces you aren’t painting, or remove hardware for cleaner results.
Keep the primer layer consistent without leaving puddles along edges or in corners.
Follow the manufacturer’s drying time, then inspect every area under bright light.
Lightly sand raised fibers or rough spots, remove the dust, and add another primer coat if the surface still looks uneven or porous.
Proper preparation improves surface adhesion and creates a stable foundation for the finish.
Apply Thin, Even Coats to Every Surface
With the primer fully dry and any rough spots smoothed, apply the cabinet paint in thin, even coats. Use a high-quality angled brush for corners, edges, and profiles, then switch to a small foam roller on broad panels. Work in the direction of the wood grain, and watch for drips along lower edges.
Don’t overload your brush or roller; excess paint can pool and create ridges. Allow each coat to dry according to the manufacturer’s instructions before lightly sanding dust nibs with fine-grit paper. Wipe away residue, then apply the next coat.
Consider color coordination with your walls, counters, and flooring before painting all doors. Your finish selection also matters: satin hides minor flaws while semi-gloss offers easier cleaning.
Inspect every surface under bright, angled light for missed spots.
Reinstall Hardware After the Paint Cures
Let the final coat cure fully—not just dry—before reinstalling the hardware. Follow the paint manufacturer’s recommended curing time, since handling cabinets too soon can leave fingerprints or compress the finish.
While you wait, organize each knob, pull, hinge, and screw with its matching door or drawer. If you changed cabinet hardware styles, confirm that the new pieces fit the existing holes; otherwise, fill and repaint before proceeding.
For accurate hardware installation, use a template to mark consistent positions across doors and drawers. Place a soft cloth beneath each piece to protect the cabinet surface, then tighten screws gradually with a hand screwdriver.
Don’t overtighten, which can damage the finish or distort the hardware. Reattach hinges and adjust doors so gaps look even.
Finally, test every door and drawer for smooth operation, and save spare screws or included tools for future adjustments.
Fix Drips, Brush Marks, and Peeling Paint
Once the hardware is back on and the doors operate smoothly, inspect the cured finish under bright, angled light. Mark drips, ridges, and brush marks with painter’s tape. Sand each defect lightly with 320-grit paper until the surface feels level, then remove dust with a tack cloth.
Apply a thin, matching coat rather than flooding the area. For effective drip prevention, load your brush sparingly, spread paint evenly, and check edges before moving on.
Use a controlled brush technique: finish each stroke in the same direction, avoid repeatedly brushing drying paint, and smooth visible lines with light pressure.
If paint peels, scrape away every loose section, feather the edges, prime exposed material, and repaint. Let the repair cure fully before reinstalling hardware or cleaning the cabinets.
Frequently Asked Questions
How Long Does Repainting Kitchen Cabinets Typically Take From Start to Finish?
You’ll typically need three to seven days from preparation through curing. Your timeline depends on cabinet size, drying conditions, Color choices, and Painting techniques; allow extra time for repairs, multiple coats, hardware, and final reassembly.
Can I Repaint Cabinets Without Removing Them From the Kitchen?
Yes, you can repaint cabinets in place—without cabinet removal—but meticulous painting preparation matters. Clean surfaces, protect counters and floors, remove hardware, lightly sand, prime, and apply thin coats, allowing proper drying time.
How Much Does It Cost to Repaint Kitchen Cabinets Professionally?
You’ll typically pay $2,000–$6,000 to repaint kitchen cabinets professionally, depending on cabinet count, condition, labor, and location. Your Cabinet color and paint finish choices can affect preparation, materials, and overall pricing.
Should I Repaint or Replace Outdated Kitchen Cabinets?
Think of your cabinets as the kitchen’s skeleton: repaint them if boxes remain solid; replace them if warped, damaged, or poorly laid out. Update cabinet hardware and make thoughtful color selection before deciding.
How Can I Protect Freshly Painted Cabinets From Future Wear?
Protect freshly painted cabinets by applying durable Protective finishes, allowing full curing time, and using gentle cleaners. Add felt pads, avoid excess moisture, and repair chips promptly to preserve Cabinet durability and appearance.
About the Author


