
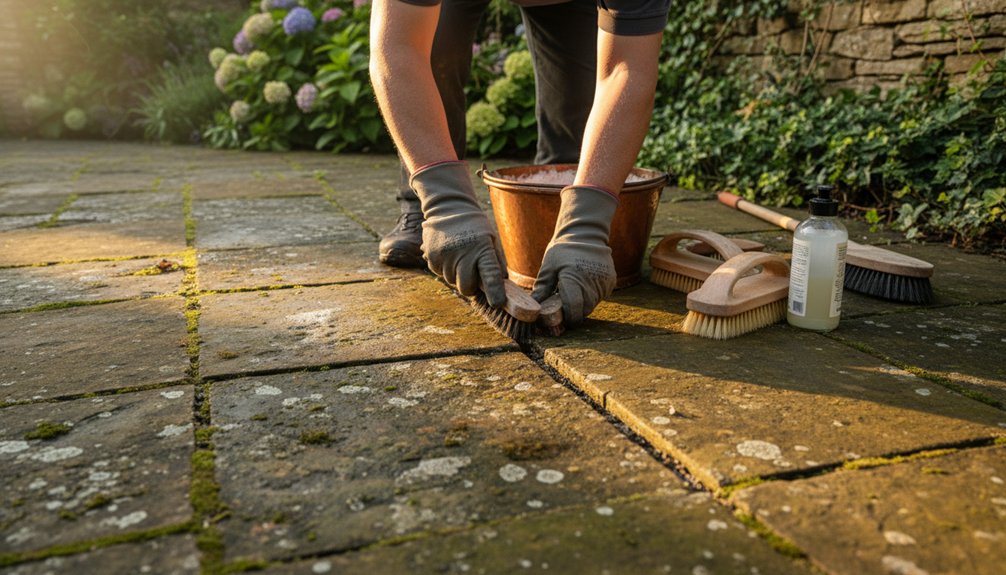
An old stone patio is a quiet record of weather, work, and family life, so you’ll want to restore it without erasing its character. Start by inspecting the surface in dry daylight, noting loose stones, damaged joints, moss, and areas where rain collects. Photograph concerns before you clear debris, then use soft brushes and plastic scrapers rather than a pressure washer. The right cleaner and joint repair can make a lasting difference—but only if you first understand what the stone and weather are telling you.
Key Takeaways
- Inspect the patio in dry daylight, documenting loose, cracked, or sunken stones, damaged joints, trip hazards, and drainage problems.
- Remove leaves, weeds, moss, and debris by hand using soft brushes and plastic tools, avoiding pressure washing.
- Identify the stone type and stain before choosing a compatible, eco-friendly cleaner; always test it on an inconspicuous area.
- Scrub gently with a soft brush and moderate hose pressure, working in small sections and rinsing thoroughly.
- Treat stubborn stains carefully, replace failed joints with breathable compatible material, and protect repairs while curing.
Check Your Patio’s Condition First

Before cleaning, inspect the patio in dry daylight so you can see its true condition. Walk across each area and note loose, rocking, cracked, or sunken stones. Check joints for erosion, gaps, and failed pointing, but don’t disturb them yet.
Look closely at steps, edges, and retaining borders, where movement can create trip hazards or allow water beneath the paving. Record stains separately: rust, oil, paint, and lime deposits may require different treatment.
Examine walls or nearby masonry for matching stone, mortar, and historic details before planning repairs. For sound patio maintenance, photograph damaged sections and mark their locations on a simple sketch.
Schedule seasonal inspections after winter frost, heavy rain, and prolonged heat. If stones shift or drainage seems poor, consult a heritage mason before washing or lifting anything.
Clear Weeds, Moss, and Debris
Once you’ve recorded the patio’s condition, remove loose leaves, twigs, soil, and other debris with a stiff, soft-bristled brush. Work along joints and edges, where windblown soil gives weeds a foothold, but avoid scraping historic stone aggressively.
Pull young weeds by hand, loosening roots with a narrow tool; don’t yank established growth if it might disturb the paving. Trim nearby shrubs and clear overhanging branches to improve airflow and sunlight, supporting weed prevention after rain.
For moss growth control, lift surface moss gently with a plastic scraper or firm brush, working on a dry, mild day. Collect every fragment rather than sweeping it into borders.
Check shaded areas again after wet weather, because old, porous stone holds moisture. Preserve surviving joint material, and never use a pressure washer at this stage; it can erode soft edges and dislodge bedding.
Choose the Right Stone Patio Cleaner
Before cleaning, identify your patio’s stone type, since old limestone, sandstone, and slate each respond differently to moisture and cleaners.
Match the formula to the stone and current weather, choosing a mild option that won’t damage historic surfaces.
Avoid harsh chemicals, which can strip patina, weaken joints, or harm nearby plants.
Identify Stone Type
How do you choose the right stone patio cleaner? Start by identifying the paving material before you disturb years of weathered character. Look closely at the surface, edges, and any exposed broken pieces.
Sandstone usually feels grainy and shows layered stone patterns, while limestone often appears smoother, softer, and more uniform. Granite looks dense, crystalline, and highly durable. Slate typically has visible flakes or clefts.
Check old building records, leftover slabs, or ask a local stonemason if the stone remains uncertain.
Notice staining, worn joints, lichen, and colour changes caused by weather effects, including frost, rain, and prolonged sun.
Photograph the patio and test your identification against an inconspicuous edge. Heritage paving can vary from one area to another, so don’t assume every slab shares the same stone.
Match Cleaner Formula
Choose a cleaner that suits both the stone and the damage you need to remove, since an unsuitable formula can etch, bleach, or weaken an old patio. Read the label for compatibility with limestone, sandstone, slate, brick, or granite, and select a product designed for dirt, algae, moss, rust, or organic staining.
Test a small, hidden area first, especially where centuries of weathering have softened the surface.
For light soil, start with Natural cleaning methods, such as warm water and gentle brushing, before choosing a stronger formula.
Look for Eco friendly solutions with clear dilution instructions and low-impact ingredients that won’t harm nearby soil or drains.
Consider the forecast, too: mild, dry weather gives the cleaner time to work without rapid evaporation or rain washing it across historic masonry.
Avoid Harsh Chemicals
Harsh chemicals can strip a patio’s weathered character, damage soft stone, and harm surrounding soil, so don’t reach first for bleach, strong acids, or aggressive solvents. Start with the gentlest cleaner that suits your stone. Sweep away grit, then test warm water and a soft brush in a hidden area.
For algae or light grime, use diluted pH-neutral soap and rinse thoroughly before it dries. These chemical alternatives protect historic surfaces while reducing runoff risks, especially before rain.
Choose eco-friendly methods whenever possible, such as hand scrubbing, targeted cleaning, and collecting dirty rinse water. Never mix products, and avoid pressure washing fragile joints or soft limestone.
If stains persist, identify their source before treating them. Work during cool, dry weather, and allow the patio to dry fully so you can judge results without overcleaning.
Scrub Stone Gently and Rinse Thoroughly
Once the cleaner has loosened the dirt, scrub the stone gently with a soft-bristled brush, working in small sections and following the surface’s natural texture. Use gentle scrubbing to lift soil from joints and uneven faces without rounding edges or disturbing historic mortar.
Keep the area damp, especially in warm, windy weather, so loosened grime doesn’t dry back onto the stone. Rinse each section with clean water before moving on, directing runoff away from walls, planted beds, and neighboring paving.
Thorough rinsing matters because leftover cleaner can attract dirt or weather the surface over time. Use a hose with moderate pressure rather than a concentrated jet, which can erode softer stone.
Work on a cool, overcast day when possible, and let the patio dry naturally before evaluating its overall condition.
Treat Stubborn Stone Patio Stains
After the patio has dried, inspect any remaining marks before treating them further. Identify each stain first, since old stone can react unpredictably to strong cleaners.
For organic marks, such as leaves or algae, apply a mild solution of warm water and a pH-neutral soap, then brush gently with a soft-bristled brush. These Eco friendly cleaning options protect historic surfaces and surrounding planting.
For oil spots, cover the area with an absorbent poultice of baking soda and water. Leave it briefly, lift the residue, and repeat rather than scrubbing aggressively.
Rust usually needs a stone-safe rust remover; test it on an inconspicuous edge and follow the label carefully.
Effective Stain removal techniques depend on patience, shade, and dry weather. Don’t use vinegar, bleach, or pressure washing, which can etch, discolor, or loosen weathered stone.
Refill Joints and Seal the Patio
When the stones are fully dry, refill any open or eroded joints with a compatible, breathable jointing material suited to the patio’s age and construction.
For historic lime-set paving, choose an appropriate lime mortar rather than hard cement, which can trap moisture and damage edges.
Brush debris from the gaps, dampen them lightly, then press in the mix without smearing the stone faces.
Keep the surface protected from rain, frost, and strong sun while it cures, following the manufacturer’s guidance.
Good joint repair supports loose slabs and limits weed growth, but don’t make joints impermeable.
Once the work has cured, consider suitable sealing techniques only if the stone and setting allow them.
Choose a breathable, non-yellowing sealer, test it discreetly, and apply thin coats in dry, mild weather.
Frequently Asked Questions
How Often Should an Old Stone Patio Be Professionally Inspected?
You should have your old stone patio professionally inspected every two to three years, or annually in harsh climates. Schedule Stone sealing, moss removal, and repairs sooner after severe weather, drainage problems, or shifting stones.
Can Furniture Damage or Scratch Restored Stone Patio Surfaces?
Yes, furniture can cause Furniture scratches and patio surface damage on restored stone. You’ll protect heritage surfaces by lifting pieces, adding breathable pads, avoiding dragging, and checking moisture, grit, frost, and uneven settling regularly.
What Weather Conditions Are Best for Cleaning and Restoring Stone Patios?
Choose mild, dry weather with temperatures around 50–75°F. Seasonal weather matters: you’ll get ideal conditions in spring or early autumn, avoiding frost, intense sun, rain, and high winds that disrupt cleaning and curing.
How Long Should You Wait Before Walking on a Restored Patio?
Wait at least 24 hours before walking on a restored patio, or follow the product label. Patio sealing may need 48 hours; Surface polishing requires gentle use until fully cured, especially in damp weather.
Can Old Stone Patios Be Made Wheelchair Accessible?
Yes, you can improve Wheelchair accessibility by leveling stones, widening routes, adding gentle ramps, and correcting drainage. Consider Railing installation near steps, while preserving historic character and choosing weather-resistant, slip-resistant materials.
About the Author


