
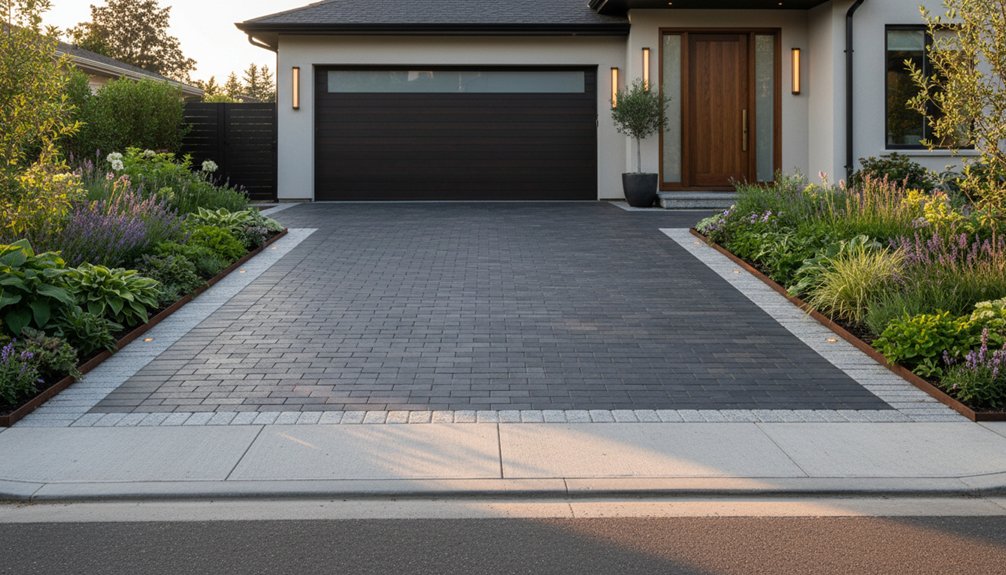
Improving your driveway can give your home an immediate kerb appeal lift without a major renovation. Start by evaluating its condition, setting a realistic budget, and tackling dirt, stains, cracks, and uneven areas. From there, you can choose between sealing, resurfacing, or replacing the surface, then add smart edging, lighting, coordinated boundaries, and tidy planting. The right combination can make a surprising difference, but the order you tackle each improvement matters.
Key Takeaways
- Deep-clean the driveway and remove oil, algae, mud, weeds, and debris to instantly refresh its appearance.
- Repair cracks, potholes, uneven sections, and crumbling edges before they become more noticeable or unsafe.
- Add contrasting edging in brick, stone, concrete, or steel to create crisp, intentional boundaries.
- Improve proportions and alignment by coordinating the driveway with gates, paths, walls, and property lines.
- Finish with warm path lighting, tidy planting, fresh mulch, and uncluttered access around the entrance.
Assess Your Driveway’s Condition and Budget

Before planning improvements, inspect your driveway for cracks, potholes, drainage problems, uneven surfaces, and crumbling edges. Note where water pools after rain, especially near kerbs, gates, and garage entrances. These signs help you decide whether you need minor repairs, resurfacing, or a complete replacement.
Consider how your local climate affects materials: freeze-thaw conditions, heavy rainfall, and strong sunlight can all influence durability. Include access, parking needs, and your property’s appearance in the assessment.
For effective driveway maintenance, record measurements and photograph existing damage before requesting quotes. Then set a realistic budget. Budget planning should cover preparation, materials, labour, drainage work, edging, and a contingency for unexpected repairs.
Compare at least three local contractors, check reviews, and confirm warranties before committing to the project.
Clean the Driveway From Top to Bottom
Once you’ve assessed the surface, remove loose leaves, grit, and debris from the highest point of the driveway down to the entrance, sweeping debris away from drains and kerbs rather than into them.
Next, pre-treat oil marks, algae, and muddy patches with a suitable outdoor cleaner, allowing it to work before rinsing.
For effective stain removal, choose a product compatible with your paving, and test it on an inconspicuous area first.
Power washing can lift ingrained dirt and revive tired-looking concrete, block paving, or tarmac, but use a moderate setting to avoid dislodging jointing sand or damaging the finish.
Work in overlapping passes, directing dirty water towards a safe collection point.
Rinse thoroughly, then let the driveway dry fully so you can judge its clean, refreshed appearance.
Repair Cracks, Stains, and Uneven Areas
Repair visible cracks before water and winter frost make them worse. You’ll need to level uneven surfaces to create a safer, smoother driveway.
Address stubborn stains at the same time for a clean, well-kept finish.
Repair Visible Cracks
Visible cracks can let water seep beneath your driveway and worsen the damage, so clean them out and fill them with a suitable concrete or asphalt patching compound. Remove loose debris with a stiff brush, then verify the area is dry before applying the filler.
Follow the product instructions carefully, smoothing the surface so the repair blends neatly with the surrounding driveway.
For wider or recurring cracks, choose a professional-grade sealant or ask a local paving contractor for advice.
Matching the repair to your existing finish helps preserve your home’s kerb appeal and complements your garden’s color schemes.
Choose products suited to your driveway type and local weather, as material durability matters through wet winters, summer heat, and regular vehicle use.
Check repairs each spring and seal new cracks promptly.
Level Uneven Surfaces
Uneven areas can collect water, create trip hazards, and put extra strain on vehicles, so identify low spots and raised sections before making repairs. Mark each problem, then clean away dirt, moss, and loose aggregate.
For shallow depressions, apply a suitable cold-lay asphalt or repair compound in thin layers, compacting each layer firmly. Trim raised edges carefully, taking care not to damage sound surfacing. This surface smoothing approach improves drainage and creates a neater finish.
Where settlement is extensive, lift affected sections, prepare a stable sub-base, and relay the material for lasting level correction. Seal repaired areas once they’ve cured, following the product guidance.
In wet British weather, check that water runs towards existing drainage rather than your house. Finish by sweeping away residue and inspecting the driveway from the kerb.
Decide Whether to Seal, Resurface, or Replace
Before choosing a solution, assess the driveway’s age, surface condition, drainage, and overall stability. If the paving looks dull but remains sound, sealing can restore colour, protect against stains, and slow weather damage. It’s a cost-effective option for relatively new asphalt or concrete with only minor hairline cracks.
Choose resurfacing when the foundation is stable but the surface has widespread cracking, fading, or shallow potholes. A new top layer can deliver a clean finish without the expense of a full rebuild.
However, major movement, deep cracks, crumbling edges, persistent puddles, or drainage faults usually signal that replacement is the wiser investment.
When choosing materials, consider your local climate, traffic, maintenance expectations, and evaluating longevity.
Ask a reputable contractor for a written assessment and quote before committing, so you’ll achieve lasting kerb appeal.
Define the Driveway With Smart Borders
Smart borders give your driveway a crisp finish while containing gravel, soil, and planting beds. Choose decorative edging that suits your home’s character, from neat concrete kerbs and brick soldiers to natural stone or powder-coated steel.
For a classic property, reclaimed brick can echo the façade; for a modern build, slim metal creates a cleaner line.
Use material contrast to make the driveway stand out without overwhelming it. Pair pale gravel with dark stone, or set warm brick against a smooth asphalt surface.
Keep the border level with the drive where pedestrians cross, and raise it slightly beside planting areas to hold mulch and soil in place.
Curves can soften a broad frontage, while straight edges complement contemporary architecture.
Before installation, mark the route and check drainage, access, and local ground conditions.
Add Driveway Lighting for Safety and Style
Good driveway lighting improves visibility, highlights your home’s entrance, and helps guests find their way after dark. Choose low-voltage LED fittings for dependable performance and lower running costs, especially during wet British winters.
Position recessed lights along the driveway edge, or use discreet bollards to create an even, welcoming glow without dazzling drivers or neighbours.
Warm-white bulbs usually complement brick, stone, and rendered façades, while timers or dusk-to-dawn sensors make operation effortless.
You can also add subtle uplighting beneath nearby planting to enhance garden aesthetics and give your outdoor ambiance a polished lift.
Keep cables protected and ask a qualified electrician to install mains-powered systems safely.
Clean lenses regularly, trim foliage that blocks illumination, and check that fittings remain securely anchored after storms.
A restrained lighting scheme looks smarter than excessive brightness and supports everyday safety.
Coordinate Gates, Paths, and Front Boundaries
Coordinate your gate, path, and front boundary by matching materials and colours with your home and driveway.
Align their lines and proportions to create a tidy, balanced entrance that suits your property.
You’ll achieve a more cohesive look without making the frontage feel overdesigned.
Match Materials And Colours
Matching your driveway’s materials and colours with the gate, garden path, and front boundary creates a cohesive entrance and can lift your home’s kerb appeal.
Start by choosing one dominant finish, such as charcoal concrete, warm brick, or natural stone, then repeat it in smaller details. Material matching doesn’t mean everything must be identical; pair complementary textures to keep the frontage welcoming rather than flat.
For example, a brick path can work beautifully with a concrete driveway when both share a warm, earthy tone. Use Color coordination to tie in painted gates, rendered walls, and planting pots.
In Australia, consider light finishes that reflect heat, while darker tones may show dust and tyre marks. Order samples, view them outdoors, and check how they look in changing daylight before committing.
Align Lines And Proportions
Align the driveway’s edges with the gate, front path, and boundary wall to create a neat, intentional entrance. Carry these lines through your paving layout, keeping joints, borders, and planting beds parallel wherever possible.
If your property slopes, use gentle curves or stepped edging to guide the eye without making access awkward. Match the driveway’s width to the gate, allowing comfortable vehicle clearance while preserving space for bins and pedestrians.
A strong central axis can make a narrow frontage feel more balanced, while offset parking may suit wider homes. Consider current Design trends, but prioritise proportions that complement your house rather than copying a showroom look.
Choose edging with proven Material durability, especially where vehicles turn. Your entrance will look calmer, larger, and thoughtfully finished.
Review sightlines from the street before finalising the setting.
Finish With Planting and Practical Details
Once the driveway surface and edging are in place, finish the project with planting and practical details that improve both appearance and everyday use.
Use Garden integration to connect the drive with existing beds, choosing low-growing plants that won’t spill onto parking areas or hide sightlines. Seasonal planting adds colour throughout the year; combine hardy shrubs, grasses, and bulbs suited to your local soil and weather.
Add a neat mulch layer to retain moisture and reduce weeds, keeping it below the edging. Check that gates open freely, bins have a convenient position, and visitors can reach the front door safely.
Soft, warm lighting along the path improves visibility without creating glare. Finally, sweep away construction dust, wash the surface, and trim surrounding growth so your upgraded driveway looks finished from every angle.
Frequently Asked Questions
How Long Do Driveway Improvements Typically Last?
Today, driveway improvements typically last 10–30 years, depending on materials and maintenance. You’ll extend their lifespan with timely repairs, thoughtful landscaping options, and durable driveway lighting suited to your local climate and conditions.
Which Driveway Materials Provide the Best Return on Investment?
Concrete and asphalt usually deliver the best return on investment, balancing durability, affordability, and broad buyer appeal. Choose based on your climate, budget, and Driveway maintenance needs; gravel remains among the most Cost effective options.
Do Driveway Improvements Require Planning Permission?
You usually won’t need planning permission for driveway improvements, but check local rules first. Permeable surfacing supports drainage, while listed homes, conservation areas, driveway aesthetics, and landscaping integration may require approval before work begins.
How Can Driveway Upgrades Improve Property Security?
You’ll improve property security through landscaping enhancements that eliminate hiding places and lighting upgrades that illuminate entrances. Choose sturdy gates, clear sightlines, and non-slip surfaces, helping deter intruders while making arrivals safer for everyone.
When Is the Best Season to Complete Driveway Improvements?
You’ll find spring and early autumn offer the best conditions for driveway improvements. Seasonal weather stays milder, while drier ground supports proper installation. Ideal timing avoids summer heat, winter frost, and disruptive local rain, delivering lasting results.
About the Author


