

About 20% of driveway damage can stem from drainage and soil problems rather than surface wear alone. Before you patch a crack or raise a sunken section, inspect the area carefully, wear gloves and eye protection, and keep people and vehicles away. You’ll need to identify the damage, find its cause, and correct water or ground instability first. Otherwise, even a neat repair may fail quickly—and create a more serious hazard later.
Key Takeaways
- Inspect and photograph cracks, sinking, drainage, roots, and unstable edges; stop if reinforcement or hazardous conditions are exposed.
- Correct drainage problems by clearing channels and redirecting downspouts before repairing cracks or lifting sunken sections.
- Clean small cracks thoroughly, apply exterior-rated filler, smooth it, and seal only after proper curing.
- Lift lightly sunken, structurally sound slabs with polyurethane foam; larger areas may require professional mudjacking or replacement.
- Keep people and vehicles away, protect utilities and landscaping, and hire professionals for severe cracking, unstable soil, or major settlement.
Identify the Driveway Damage
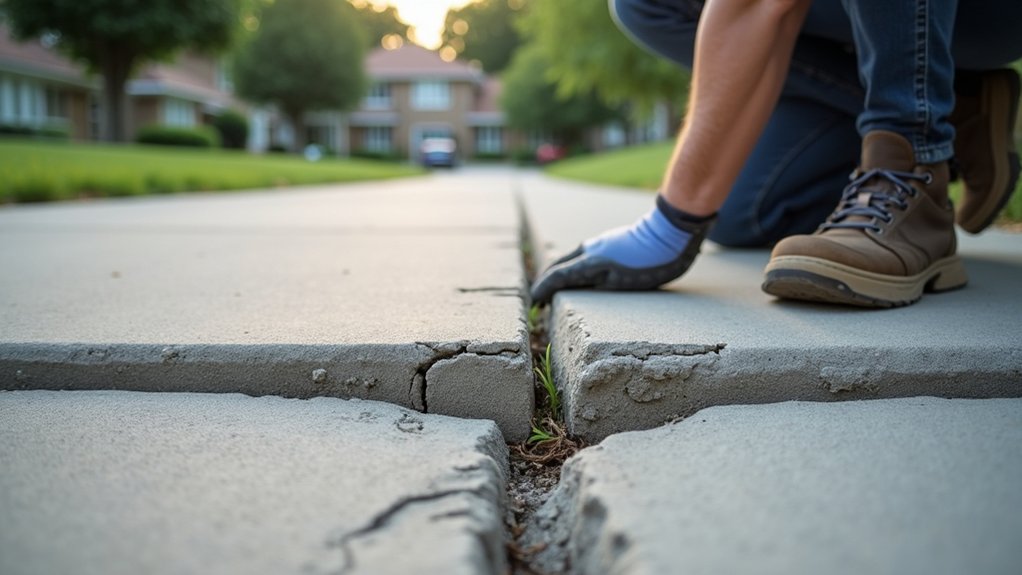
Before you begin repairs, inspect the driveway to determine the damage’s cause and extent. Wear sturdy shoes and gloves, then keep children and vehicles away from the area. Mark each crack, depression, raised edge, or crumbling section with chalk. Measure crack width, sunken depth, and affected length, recording your observations with photos.
Check whether damage appears isolated or spans several sections, but don’t disturb loose material yet. Note drainage patterns, nearby roots, utility covers, and previous patching. Historical repairs can reveal recurring weak spots and help you choose compatible materials.
Consider driveway aesthetics as you document color differences, surface texture, and transitions between old and new concrete or asphalt. If you find exposed reinforcement, sharp debris, or an unstable edge, stop and arrange professional evaluation before proceeding with repairs or cleanup.
Find Out Why the Driveway Sank
Trace the sinking to its source before choosing a repair method. Check whether the base has compacted unevenly, soil has shifted, or vehicles have overloaded one area.
Look for widening cracks, loose edges, exposed aggregate, or a depression that continues beneath an adjacent slab. Probe soft spots cautiously with a rod, and note whether the section moves underfoot.
Don’t excavate near utility lines; contact your local utility-locating service before digging. Ask a qualified contractor to assess severe settlement, unstable soil, or damage near the foundation.
Identify the original cause, not just the visible low spot, so your repair lasts. Consider how the fix will support Driveway aesthetics and landscaping integration without creating trip hazards.
Record measurements and photos to guide estimates and compare future movement.
Fix Drainage Problems Before Repairs
Poor drainage can keep soil saturated and cause a repaired driveway section to sink again. Before you repair cracks or low spots, observe where water collects after rain. Check downspouts, gutters, nearby slopes, and drains that may direct runoff toward the pavement.
Redirect downspouts away from the driveway, clear blocked channels, and restore any damaged drainage features. If water crosses the driveway, consider a properly sized trench drain or swale. Don’t excavate near buried utilities, and wear gloves and eye protection while clearing debris.
For persistent flooding, ask a drainage professional to evaluate the grade and soil conditions.
Plan solutions that protect both landscaping aesthetics and driveway design. Keep runoff from neighboring areas off the repair zone, and let the ground drain and stabilize before patching or replacing concrete. Verify that water flows safely away during another rainfall.
Gather Driveway Repair Tools and Materials
Gather the tools and materials that match the repair, such as a wire brush, chisel, gloves, eye protection, concrete cleaner, patching compound, a trowel, a level, and a straightedge.
Add a dust mask, sturdy work shoes, a bucket, water, and a stiff broom.
Choose products labeled for exterior concrete and verify their temperature and moisture requirements before buying.
If a section is sunken, prepare a shovel, gravel, and suitable leveling material, but follow the product instructions for exact quantities.
Keep a measuring tape and marker nearby to outline work areas accurately.
Protect nearby plants, edging, and walls with plastic sheeting, supporting Landscaping integration and preserving Driveway aesthetics.
Don’t substitute household fillers for concrete products.
Organize everything within reach, inspect tools for damage, and keep children and pets away before you begin.
Repair Small Concrete Driveway Cracks
For small cracks, you’ll first clean out dirt and debris so the filler bonds properly.
Apply concrete filler according to the product instructions, then smooth it level with the driveway.
Once it cures, seal the repair to help block moisture and prevent further damage.
Clean the Cracks
Before repairing small concrete driveway cracks, clean out all dirt, weeds, loose concrete, and debris with a stiff wire brush or compressed air. Use careful cleaning techniques so the crack’s edges remain intact.
For narrow gaps, work a stiff nylon brush through the opening, then blow away loosened particles. Wear safety glasses and a dust mask, especially when using compressed air, and keep the nozzle pointed away from people, pets, and vehicles.
If weeds have rooted inside, pull them out completely and remove any remaining soil. Don’t wash the area unless you can let it dry fully; moisture can interfere with crack sealing.
Inspect the cleaned crack for crumbling edges or hidden debris, and brush again if necessary. A clean, dry surface helps the repair bond securely and last longer.
Apply Concrete Filler
Once the crack is clean and completely dry, apply a concrete filler designed for narrow driveway cracks. Wear gloves and eye protection, then read the product label carefully for mixing, temperature, and curing requirements.
Use a caulk-style filler for flexible hairline cracks, or mix a patching compound when the gap needs more support. Hold the nozzle or putty knife slightly above the opening, and work the material into the full depth without leaving air pockets.
Overfill the crack slightly, then strike off the excess with a clean trowel or putty knife. Keep filler off surrounding surfaces, and wipe smears away before they harden.
Choose a color that blends with your slab; concrete coloring can improve driveway aesthetics. Don’t fill moving joints or large, unstable gaps with this method.
Seal the Repair
After the filler has cured as directed, seal the repair with a compatible concrete sealer to block moisture and protect it from weather and traffic. Check the product label for coverage, temperature limits, and drying time before you begin.
Sweep away dust, then apply a thin, even coat with a roller or brush. Keep the sealer out of nearby grass, soil, and driveway landscaping, and don’t let puddles form.
Wear gloves, eye protection, and suitable footwear, and maintain ventilation if the product contains strong solvents.
Block the driveway until the sealer has fully cured, even if it feels dry sooner. Don’t apply sealer over damp concrete or when rain, freezing temperatures, or intense heat threaten.
Once cured, inspect the patch and confirm its paint color or finish blends with the surrounding driveway.
Handle Large or Structural Concrete Cracks
Large or structural cracks—especially those wider than ¼ inch, spreading across the slab, or paired with sinking—usually indicate more than surface damage. Don’t simply fill them and expect lasting results.
First, block off the area and inspect for loose concrete, exposed reinforcement, drainage problems, and soil movement. If the slab has dropped, shifted, or separated, contact a qualified concrete contractor. They may recommend slab lifting, partial replacement, or full removal and repouring after correcting the base.
Avoid unplanned concrete mixing near the damaged section; incorrect proportions or poor bonding can worsen failure. Keep vehicles and pedestrians away until a professional evaluates the risk.
Although appearance matters, driveway aesthetics shouldn’t outweigh structural safety. Document the damage, note when it worsens, and address water runoff before rebuilding the affected section.
Seal Cracks in an Asphalt Driveway
For asphalt cracks that are narrow, stable, and limited to the surface, sealing them can keep water out and slow further damage. First, check the forecast for at least 24 hours of dry weather.
Wear gloves and eye protection, then remove weeds, dirt, and loose debris with a brush or compressed air. Let the crack dry completely.
Apply a quality asphalt crack filler according to the label, keeping the bead slightly below or level with the pavement. Smooth it with a putty knife if required, and don’t overfill.
Keep people and vehicles off the repair until it cures. Don’t seal wide, spreading, deeply sinking, or crumbling cracks; those may indicate a larger problem requiring professional evaluation.
Include crack checks in seasonal maintenance to protect driveway aesthetics and pavement life.
Lift and Level Sunken Driveway Areas
Assess the sunken area to identify its depth, size, drainage issues, and any unstable edges.
Choose a lifting method—such as slab jacking or polyurethane foam injection—that suits the damage and soil conditions.
Wear safety gear, keep people clear, and follow the method’s instructions carefully.
Assess the Sunken Area
Before lifting a sunken driveway section, inspect its size, depth, and surrounding cracks to determine whether the slab can be raised safely.
Walk around the area and note uneven edges, widened joints, loose pieces, and water pooling.
Use a straightedge or level across the slab to identify the lowest points, then measure the drop against a stable section.
Check whether nearby concrete, curbs, steps, garage floors, or drainage features have shifted.
Mark underground utilities and keep people, vehicles, and pets away while you assess the surface.
Consider driveway aesthetics and landscaping integration, since raising one section may affect borders, soil, or adjoining paths.
If the slab has broken into several unstable pieces, exposes damaged subgrade, or sits near structural elements, stop and arrange a professional evaluation before continuing.
Choose a Lifting Method
Once you’ve confirmed that the slab is suitable for repair, choose a lifting method based on its size, drop, condition, and surrounding structures.
For small, lightly sunken sections, polyurethane foam injection provides controlled lifting with minimal disturbance.
Mudjacking, which pumps cement-based grout beneath the slab, may suit larger areas but adds weight and requires larger access holes.
If the base remains unstable, address soil stabilization before lifting to prevent future settlement.
Check nearby steps, walls, utilities, and garage thresholds, since raising the slab can shift water flow or create trip hazards.
Don’t lift severely cracked or broken concrete; replace it instead.
After leveling, let the material cure as directed, restore joints, and consider driveway sealing to limit water intrusion and protect the repaired surface from weather and wear.
Avoid Common Driveway Repair Mistakes
Avoid common driveway repair mistakes by fixing the underlying drainage or soil problem instead of simply filling the crack or low spot. Clear clogged drains, redirect downspouts, and compact replacement soil in thin layers so water won’t keep weakening the base.
Don’t apply patching compound to wet, dirty, or freezing surfaces; clean and dry the area, then follow the product’s temperature and curing instructions.
Avoid raising one section too high, which can create a trip hazard and direct water toward your garage or home. Match repair materials to your existing pavement, and seal only when conditions are suitable.
Consider driveway aesthetics and landscaping integration before changing grades or edges. Keep pedestrians and vehicles away from fresh repairs, and wear gloves and eye protection while cutting, mixing, or handling materials.
Know When Damage Needs a Professional
Assess crack severity by checking its width, depth, movement, and whether the driveway has sunk.
If you spot shifting slabs, major settlement, drainage issues, or damage near the foundation, don’t attempt a DIY repair.
Consult an experienced contractor to identify structural problems and recommend a safe, lasting solution.
Assess Crack Severity
Before you repair a driveway crack, determine whether it’s a surface flaw or a sign of deeper damage. Start by cleaning loose debris from the area, then inspect the crack in good light.
Hairline cracks that stay narrow, dry, and level often need only routine filling. Wider openings, crumbling edges, or cracks that keep spreading deserve professional evaluation.
Measure the width and mark the ends with chalk so you can track changes over time. Check after rain and freezing weather, because weather impact can enlarge small flaws.
Also note whether water collects nearby or the surface looks uneven; these signs affect safety and driveway aesthetics.
Don’t seal a crack you can’t fully assess. If you’re unsure, pause the repair and ask a qualified contractor for advice before damage worsens.
Identify Structural Problems
Once a crack shows signs of movement or underlying damage, treat it as a structural problem rather than a simple surface repair. Watch for sections that sink, rise, rock under your tires, or separate along widening joints.
Doors, gates, or drainage grates may stop aligning, while water could collect beside the damaged area. These signs often point to unstable soil, poor drainage, washout, or a weakened base—not merely damaged concrete or asphalt.
Don’t drive over severely uneven sections, especially when edges could collapse or trip someone. Check whether nearby tree roots, eroded slopes, or altered landscaping are contributing to movement.
Protect driveway aesthetics by recognizing damage early, and consider landscaping integration when identifying runoff paths and root pressure. Stop cosmetic patching if cracks return quickly, spread, or reveal hollow areas beneath the surface.
Consult Experienced Contractors
Call an experienced driveway contractor when sections sink, shift, rock under vehicles, or show deep, spreading cracks. These signs may indicate unstable soil, poor drainage, or damaged base layers that patching won’t correct. A professional can inspect the slope, evaluate drainage, identify hidden hazards, and recommend lifting, removal, or reconstruction.
Don’t drive over severely displaced concrete or asphalt until someone assesses it; uneven surfaces can damage vehicles or cause trips.
Before hiring, verify Contractor credentials, including licensing, insurance, references, and relevant local experience. Ask for a written estimate that explains preparation, materials, drainage corrections, cleanup, and payment terms.
Confirm whether the proposed fix addresses the underlying cause rather than only covering visible damage. Review Repair warranties carefully, including coverage duration, exclusions, and required maintenance.
Compare qualified contractors, but don’t choose solely by the lowest bid; dependable workmanship protects your driveway and budget.
Frequently Asked Questions
How Long Should You Wait Before Driving on a Repaired Driveway?
Like a watched clock, curing takes patience: wait 24–48 hours before driving on asphalt repairs, and up to 72 hours after driveway sealing. Follow product instructions; asphalt expansion requires warm, dry conditions and careful loading.
Can Driveway Repairs Be Completed During Cold or Rainy Weather?
You can complete driveway repairs in mild cold, but avoid freezing temperatures and rain. Check weather conditions before repair scheduling; protect fresh materials, postpone sealing, and follow product curing guidance to guarantee safe, durable results.
How Much Does Professional Driveway Repair Typically Cost?
You’ll typically pay $300–$3,000 for professional driveway repair, depending on damage, size, and materials. Driveway sealing costs less, while Asphalt resurfacing costs more. Request multiple written estimates, verify insurance, and avoid unusually low bids.
How Can Repaired Driveway Areas Be Matched to Existing Surfaces?
Match repaired driveway areas through Color matching and Surface blending: clean adjacent surfaces, select compatible materials, feather edges, and texture the repair consistently. You’ll achieve better results by testing color first and allowing proper curing time.
What Maintenance Helps Prevent Future Driveway Cracking and Sinking?
You’ll prevent nearly every future driveway problem by keeping water away: clean gutters, maintain drainage, perform crack sealing promptly, apply seal coating periodically, avoid overloaded vehicles, and address settling before damage spreads or worsens.
About the Author


